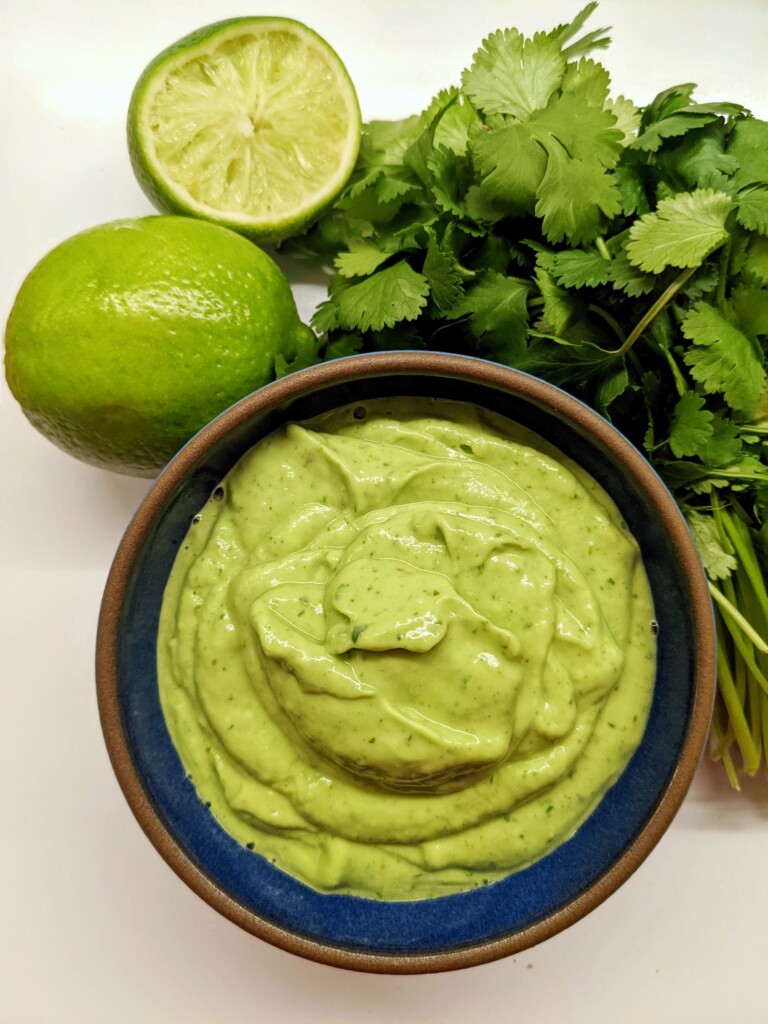
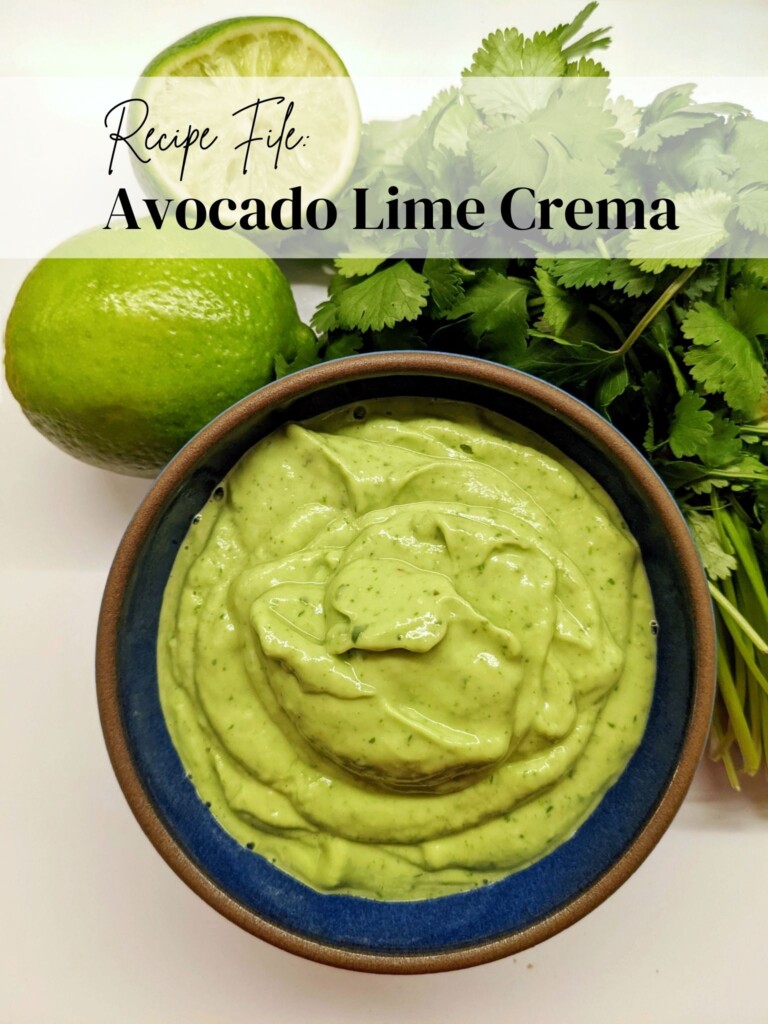
Recipe File: Avocado Lime Crema

I love making tacos for a semi-quick and easy dinner and firmly believe that every taco tastes better with a little something, something. That something is an avocado lime crema that not only goes perfectly on tacos, but also pairs well with roasted veggies.

Here’s my go-to avocado lime crema recipe, and some ideas for what to pair it with.

Avocado Lime Crema Recipe

What you’ll need: 

  • A blender or food processor (I used a blender – favorite is this OG Vitamix!)
  • 1 ripe avocado
  • 1/2 bunch of cilantro
  • 1 lime
  • 1 clove of garlic
  • 2 teaspoons greek yogurt
  • salt
  • pepper

Steps: 

  1. Wash and lightly chop your cilantro, and garlic (you’ll be blending these so no need for a thorough chop).
  2. Place avocado, cilantro and garlic into a blender. Add in a tablespoon of greek yogurt, two teaspoons of extra virgin olive oil, and juice of half a lime. Sprinkle in a pinch of salt and pepper.
  3. Blend it all together until you get a smooth and creamy consistency. If needed, add in a splash of water and blend more.
  4. Taste and season as needed (another squeeze of lime never hurts! If you like more a bite from garlic, feel free to also throw another garlic clove in).
  5. Pour mixture into a small bowl and enjoy!

I put this avocado lime crema on all kinds of tacos (shrimp tacos, black beans tacos, chicken tacos… the list goes on. It also is great as a dip for all kinds of roasted vegetables (broccoli, potatoes, carrots, etc.). Have fun with it and let me know your favorite pairings in the comments.

Save this post in Pinterest for later:

Avocado Lime Crema Recipe


Some links in this post may be affiliate links, which means if you buy something, my blog will receive a small commission at no extra cost to you. 

2022-02-11T13:39:33-08:00February 10th, 2022|Categories: Recipes|Tags: , , , |0 Comments

Recipe File: Pitaya Smoothie Bowl

Smoothie bowls remind me of summer and that’s really why I love them. They are also just so versatile and quick to put together for breakfast, lunch or a snack. So here’s a recipe using frozen pitaya, a.k.a dragonfruit: a beautiful bright pink superfruit that’s rich in magnesium, high in fiber, is a great source of iron, and is rich in antioxidants. (The list goes on so you can read more here).

Pitaya Smoothie Bowl

Smoothie Base (for 2 servings):

Toppings (Have fun with your toppings. Below are some ideas for toppings that you can use, but mix and match to your liking!)

  • Chia seeds
  • Hemp seeds
  • Peanut butter or almond butter
  • Granola
  • A drizzle of honey
  • Coconut flakes
  • Fresh fruit (berries, bananas, pineapple, etc.)
  • Almonds
  • Cacao nibs

Steps: 

  1. Blend together the frozen pitaya, banana, frozen berries, collagen peptides and milk/water/juice until smooth and thick.
  2. Pour the smoothie base into a bowl and top with your favorite toppings.
  3. Enjoy right away. If you’re planning to save it for later, I’d recommend refrigerating the smoothie base, then taking it out and putting the toppings on when you’re ready to eat.

Quick, easy and healthy! My favorite kind of recipe. Have fun with the toppings and enjoy!

2022-02-09T17:14:07-08:00February 9th, 2022|Categories: Recipes|Tags: , , |0 Comments

Recipe File: Double Chocolate Zucchini Bread

At first I didn’t know how to feel about a zucchini bread, but this recipe really got me. With the combination of dark chocolate and grated zucchini, you get a perfectly moist and chocolate-y loaf of bread that’s great as dessert or a simple breakfast.

This is also a fairly simple loaf of bread that comes together quickly and easily. Try it for yourself and enjoy!

Double Chocolate Zucchini Bread

Double Chocolate Zucchini Bread: 

Servings: 1 loaf

What you need: 

  • 1 loaf pan
  • 1 cup of grated zucchini
  • 1/2 cup avocado oil (Chosen Foods 100% Avocado Oil is my #1)
  • 1 egg
  • 1 1/4 cup flour
  • 1/4 cup almond milk (love an almond milk like Simply that just has almonds! You can also use regular milk or oat milk for this recipe).
  • 1/2 teaspoon vanilla
  • 3/4 cup sugar
  • 2 tablespoons cocoa powder
  • 1/4 teaspoon baking powder
  • 1/2 teaspoon baking soda
  • 1/2 teaspoon salt
  • 3/4 cup chocolate chips + a hand full of chocolate chips for sprinkling

Steps: 

  1. Pre-heat your oven to 350 degrees F.
  2. Butter your loaf pan.
  3. In a bowl, whisk together the oil and sugar until fluffy. Stir in the egg, almond milk and vanilla.
  4. Add in your dry ingredients: flour, salt, cocoa powder, baking soda and baking powder. Mix together until flour is just combined.
  5. Fold in the zucchini and chocolate chips.
  6. Place batter into your loaf plan and sprinkle a few more chocolate chips on top.
  7. Place into your pre-heated oven for about an hour. You can also check if the zucchini bread is done by inserting a knife or skewer in the middle and making sure it comes out clean.
  8. Let cool, then enjoy!

Double Chocolate Zucchini Bread

2021-12-22T14:58:57-08:00March 16th, 2018|Categories: Recipes|Tags: , , , |0 Comments

Recipe File: Cast Iron Buttermilk Cornbread

A great cornbread will never let you down — whether it’s for Thanksgiving or just as a weeknight treat.

This is one of my favorite cornbread recipes because it’s simple to whip together and you get a great crust from the cast iron pan. Try it for yourself and let me know what you think!

Cast Iron Buttermilk Cornbread

Cast Iron Buttermilk Cornbread

What you need: 

  • 1 8″ cast iron skillet (I love Lodge for cast irons!)
  • 2 eggs, room temperature
  • 1/2 cup butter, melted
  • 1/2 cup sugar
  • 1 cup buttermilk
  • 1/2 teaspoon baking soda
  • 1 cup flour
  • 1 cup cornmeal
  • 1/2 teaspoon salt
  • 3 tablespoons avocado oil

Steps: 

  1. Pre-heat your oven to 400 degrees F & coat your cast iron with avocado oil (any kind of vegetable oil will work) using a paper towel.
  2. Mix together the melted butter and sugar. Add in the egg and whisk together until fluffy.
  3. Whisk in the buttermilk and baking soda. Then add the cornmeal, flour and salt. Your batter will be slightly lumpy.
  4. Add in the batter into your cast iron skillet and bake for about 20 minutes or until a toothpick or knife come out clean from the center when inserted.
  5. Enjoy!
2021-12-22T14:59:42-08:00March 2nd, 2018|Categories: Recipes|Tags: , , |0 Comments

Recipe File: Fig Galette

I love seasonal fruit and flowers (peonies anyone?) so when I saw figs at Trader Joe’s last weekend, I instantly reached for them.

Stuck on deciding between the black Mission figs, Tiger figs and green figs… I chose the green figs to try something different. Green Kadota figs are a little less sweet than their cousins but reach the perfect level of sweetness when paired with mascarpone and honey.

In addition to snacking on fresh figs with some prosciutto and thinking about the several things I could do with them (fig jam, roasted figs and honey, bacon or prosciutto wrapped figs…), I settled down and decided to make the easiest of desserts – a galette.

Recipe File: Fig Galette | Chicisms

Recipe File: Fig Galette | Chicisms

Recipe File: Fig Galette | Chicisms

What you’ll need:

  • Pie dough (I cheated and used store-bought pie dough I already had in the freezer)
  • 1 pound of fresh figs
  • 1 teaspoon honey
  • 1 teaspoon water
  • Cane sugar to sprinkle on top

Directions: 

  1. Prepare your pie dough, whether you’re making it yourself and grabbing a pre-made one.
  2. Wash your figs and cut them lengthwise in 1/4-inch thick slices.
  3. In a small bowl, stir together honey and water (you can warm up the honey beforehand in the microwave so it’s easier to blend).
  4. Preheat the oven to 375 degrees. On a baking sheet, roll out your pie dough into a circle. Top with figs in concentric circles, leaving about an inch and a half border. Fold dough edges over the figs.
  5. Brush the figs and dough with the honey and water mixture. Sprinkle cane sugar on top.
  6. Place in the oven and bake for about 35 minutes or until the crust is golden brown and the fig juices begin to bubble.
  7. Let cool for about 15 minutes. Enjoy warm or at room temperature!
2017-04-17T15:28:18-07:00August 9th, 2015|Categories: Recipes|Tags: , , , |2 Comments
Go to Top